103.5. Query for images with ADQL
For the Portal Aspect of the Rubin Science Platform at data.lsst.cloud.
Data Release: DP1
Last verified to run: 2025-06-11
Learning objective: Query for image data with Astronomy Data Query Language (ADQL).
LSST data products: visit_image
Credit: Originally developed by the Rubin Community Science team. Please consider acknowledging them if this tutorial is used for the preparation of journal articles, software releases, or other tutorials.
Get Support: Everyone is encouraged to ask questions or raise issues in the Support Category of the Rubin Community Forum. Rubin staff will respond to all questions posted there.
1. Rationale for preparing the ADQL query using UI aspect of the Portal. While it is possible to enter the ADQL query directly into the ADQL aspect of the Portal, if the goal is to query and examine images containing a given location - using the UI aspect to create the ADQL query is probably simpler as it involves only a few steps.
2. Prepare the ADQL query using the UI aspect.
Navigate to the “DP0.2 Catalogs” tab in the Portal UI.
In “Table Collection (Schema)” select “dp1_v29” and in the “Tables” select “dp1_v29.ObsCore” table.
Leave the blue checkmarks in the “Output Column Selection and Constraints” as defaulted.
Under “Enter Constraints” for “Query Type” check “Observation boundary contains point”.
For coordinates, enter 53.0, -28.0.
In “Observation Type and Source” check “PVI(2)” - this selects the individual calibrated exposures (Processed Visit Images).
Leave “Temporal” and Object ID Search” unchecked, but of course it is possible to restrict the search to observations conducted during specific times.
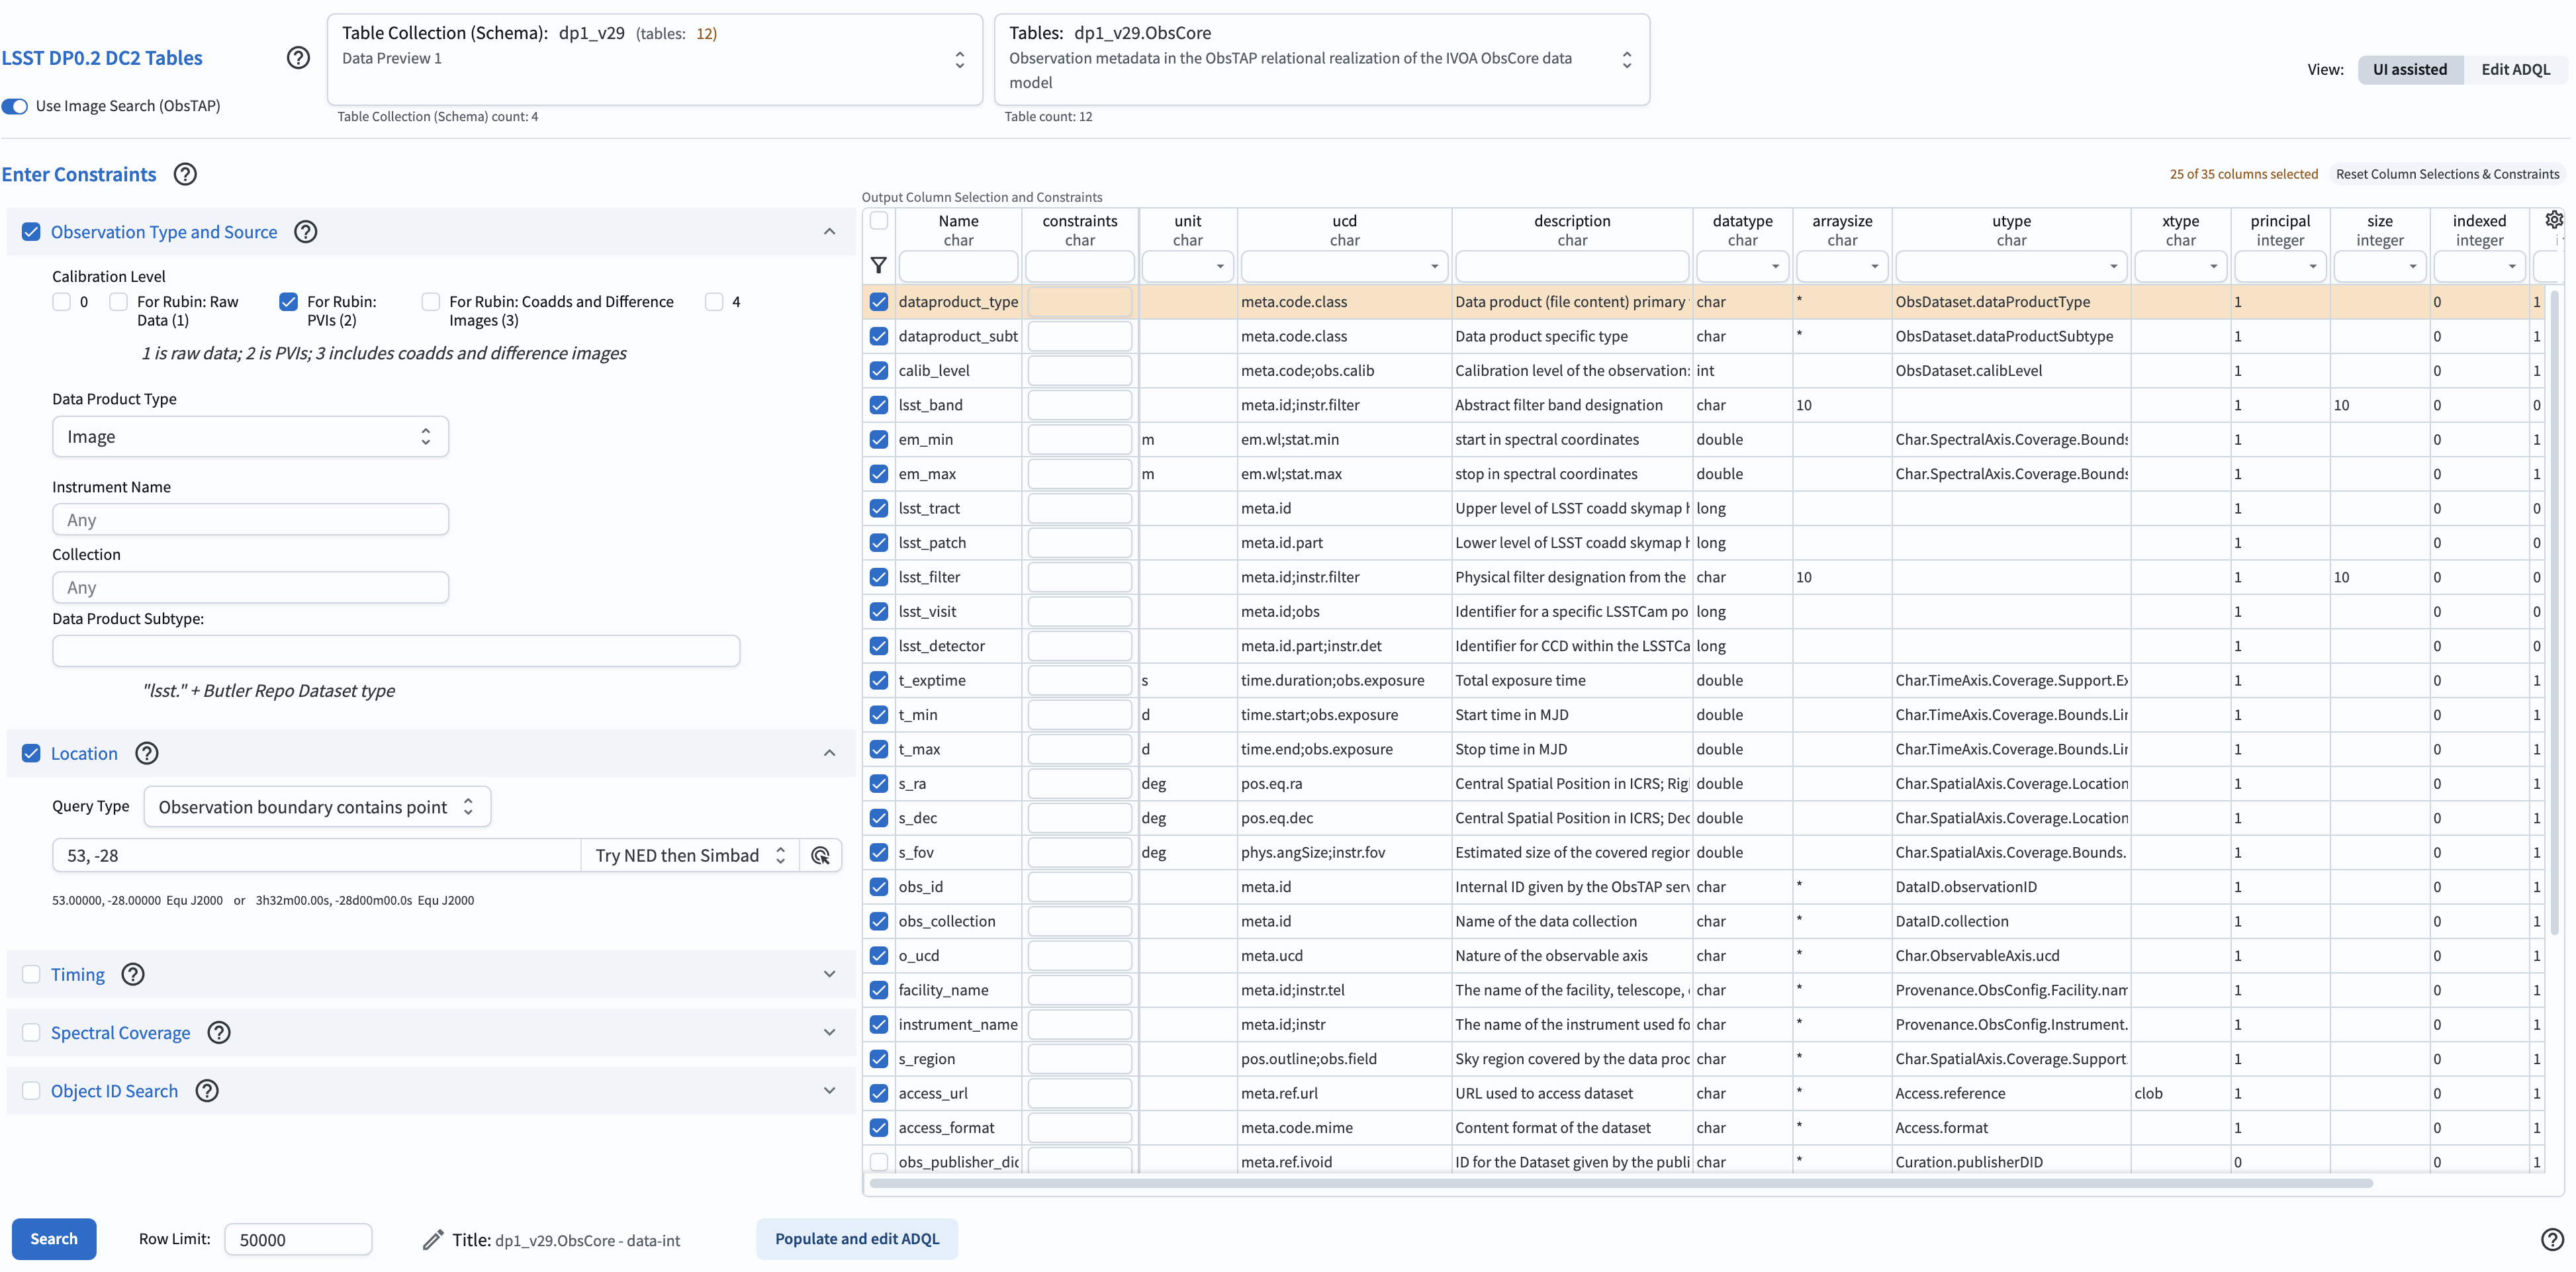
Figure 1: The Portal UI set up to search for images corresponding to the constraints in the “Enter Constraints” area.
3. Convert the parameters selected via UI to an ADQL query. Click on the box “Populate and edit ADQL”. This will result in the ADQL aspect of the Portal, with the UI query above converted to an ADQL query. You can enter the query manually (or edit it) if needed.
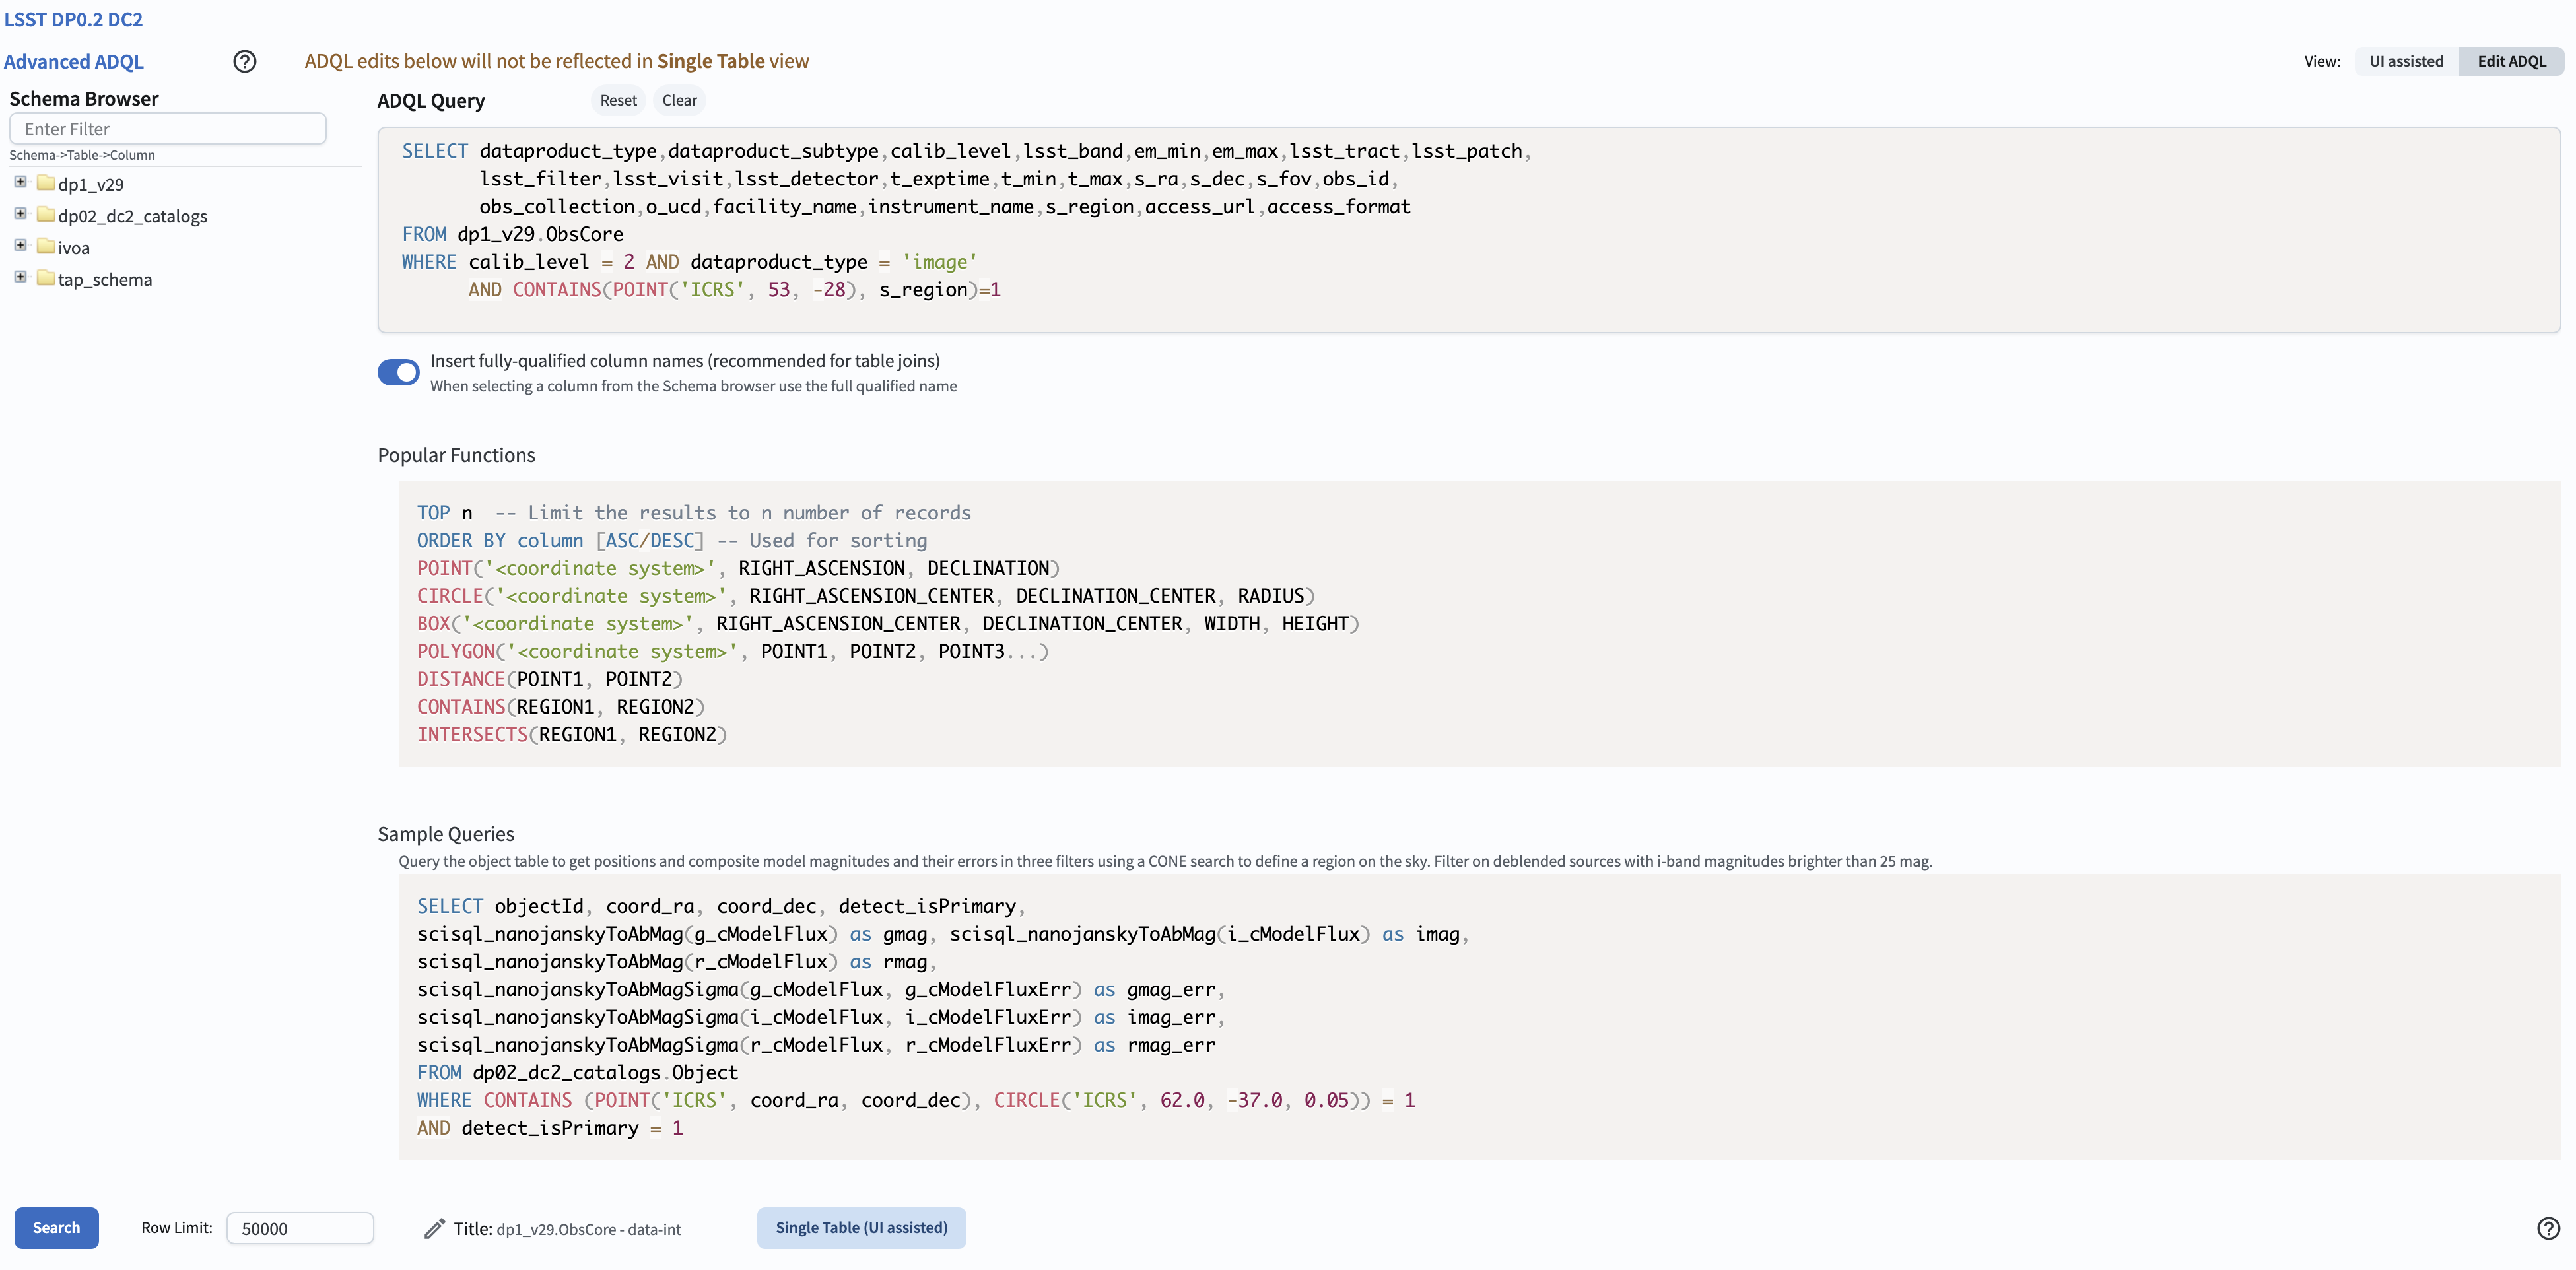
Figure 2: The Portal ADQL aspect, illustrating the query converted from UI to ADQL and corresponding to the constraints entered in the UI aspect.
4. Examine the resulting image(s). Click on the “Search” button. This will result in the image on the upper left corresponding to the first entry in the table on the bottom, and the scatter point of telescope pointings on the upper right, as shown in the screenshot below. Other images can be examined by clicking other entries in the table on the bottom.
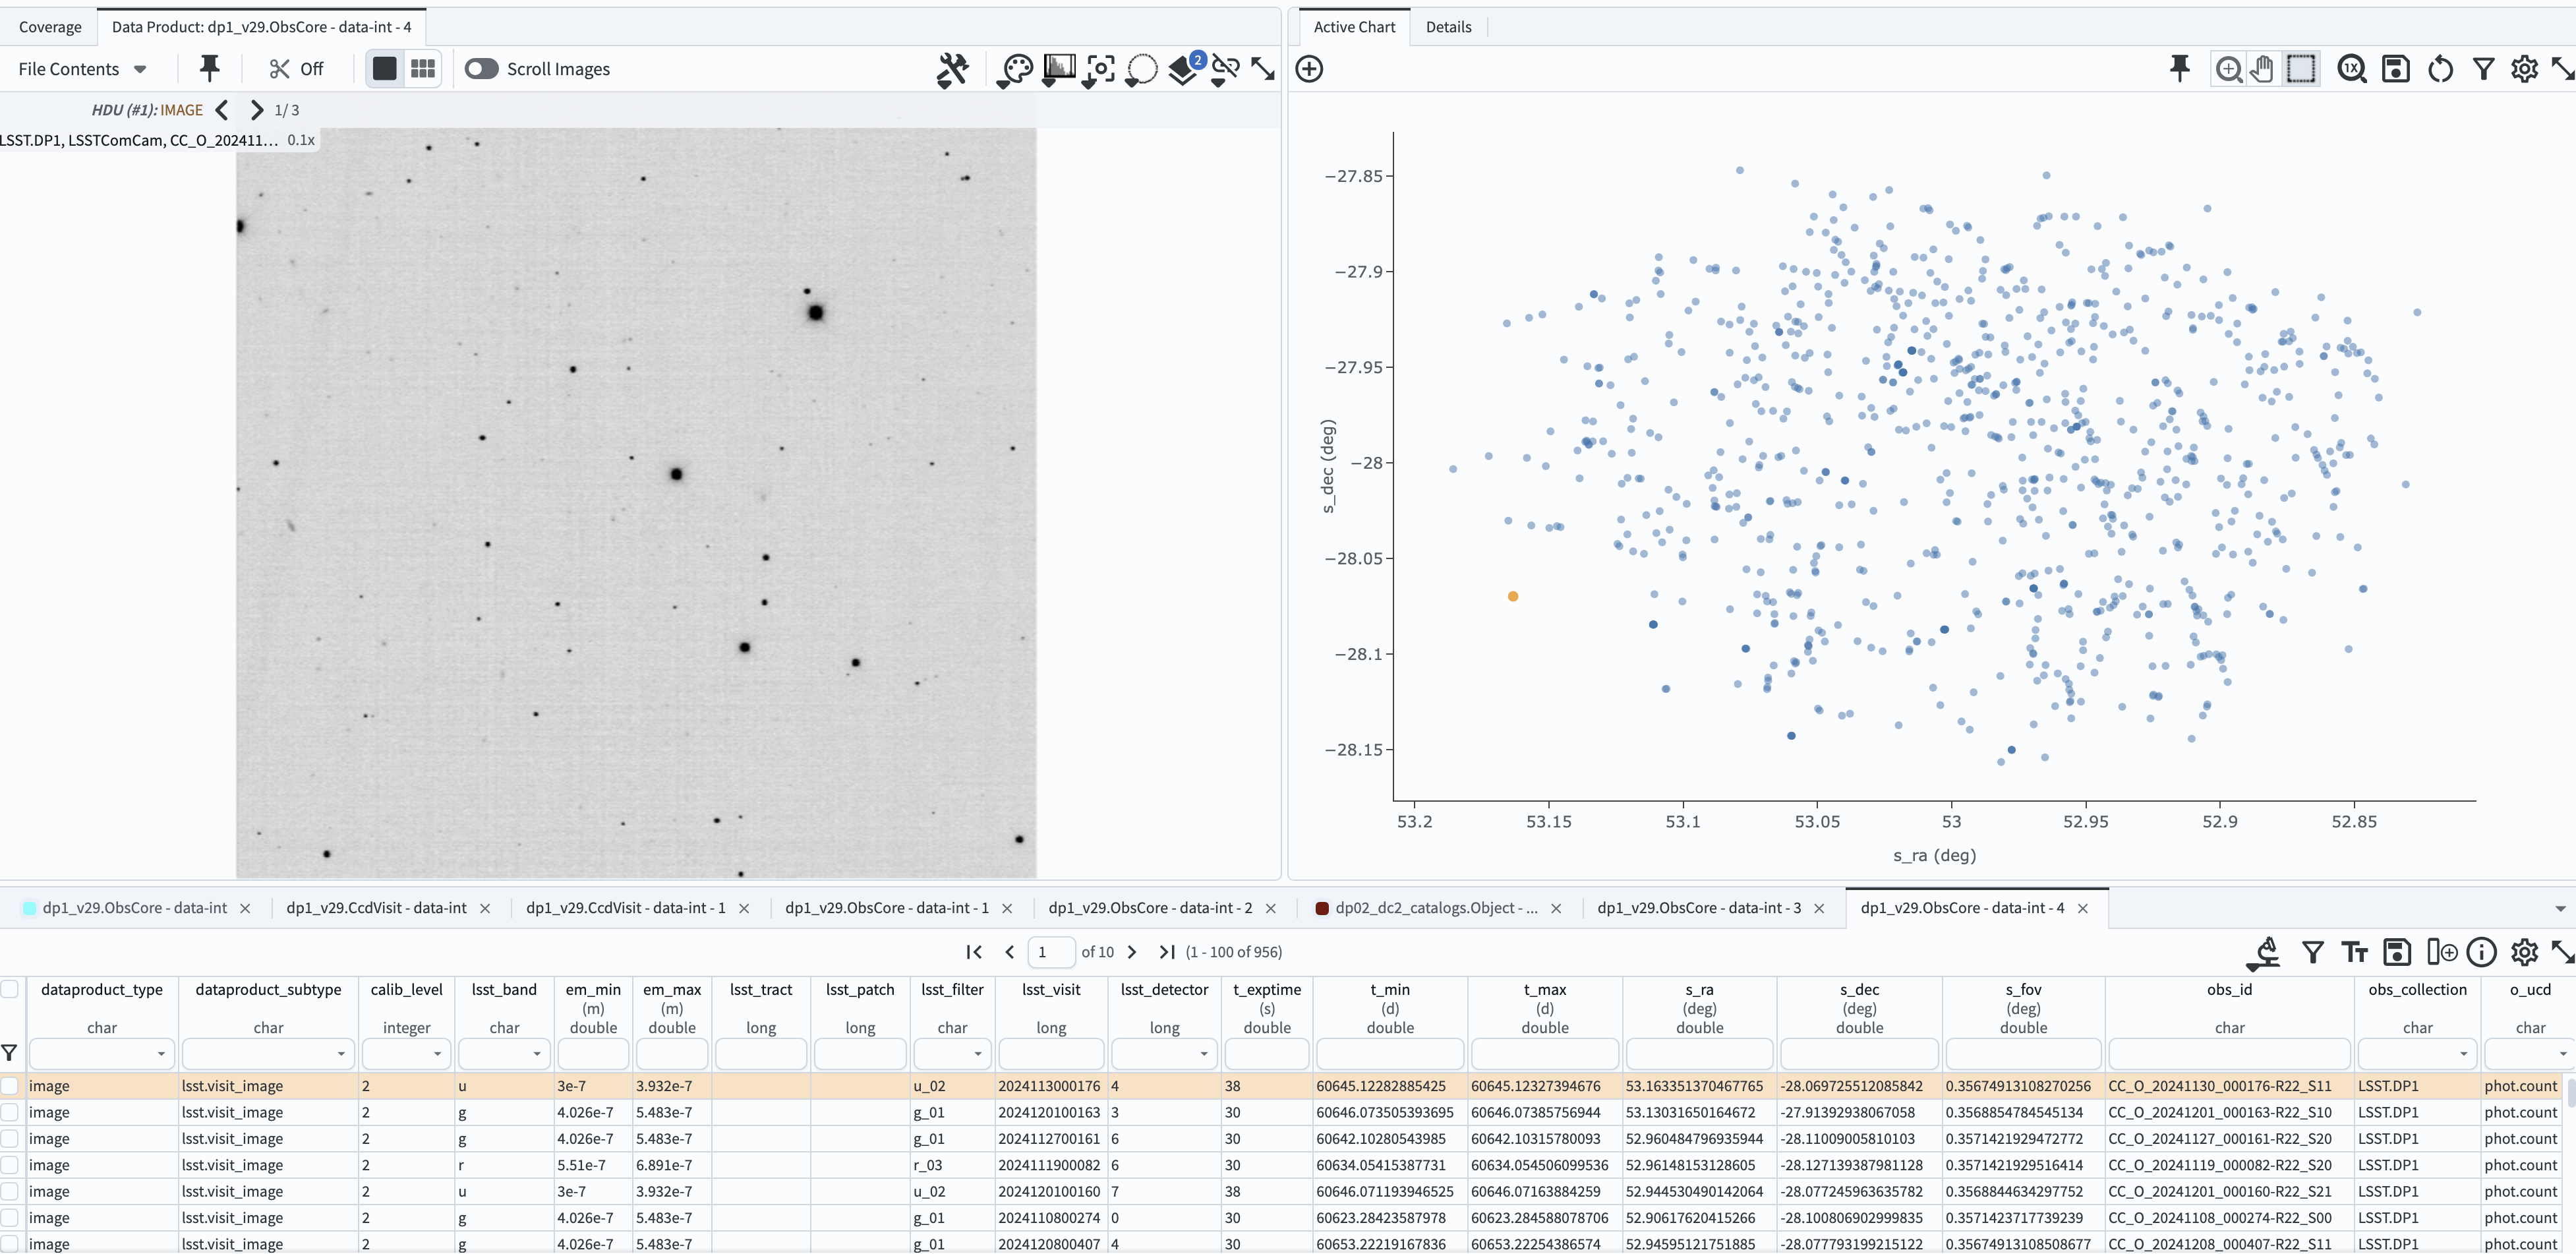
Figure 3: The screenshot of the image, the scatter plot, and the table resulting from executing the ADQL query in Figure 2.
See the tutorials in the series on manipulating image data in the results interface.